The whole process of registering and using GitHub Pages
view my personal blog original article for more:
https://alvincr.com/2021/01/github-pages/
1 background knowledge
If there is something unclear about the steps in my article, you can refer to the official website below. All content has detailed answers to the norms.
Official website address : https://github.com/
Tutorial address : https://docs.github.com/en/ free-pro-team@latest /github/working-with-github-pages/creating-a-github-pages-site
First To register github account, registered address in accordance with the registration process on the line.
1 What are github pages
GitHub Pages is a static site hosting service. You can get HTML, CSS, and JavaScript files directly from the repository on GitHub, and you can also choose to run these files during the build process and publish the website. You can host the site on GitHub’s github.io domain or your own custom domain.
The publishing source of the GitHub Pages website is the branch and folder where the source files of the website are stored. If there is a default publishing source in the repository, GitHub Pages will automatically publish the website from that source. The default release source for user and organization sites is the root of the default branch of the repository. The default publishing source of the project site is the root of the gh-pages branch.
Therefore, using github pages, you can create your own blog on the github server. I believe its server is many times better than the server I use. Of course, how many can be allocated to individuals.
2 Create a repository
Before creating a site, you must have a site repository on GitHub. The repository is also called Repository. In this article, it is referred to as repo. Repo is equivalent to the company headquarters. The head office is controlled by github, and it controls many subsidiaries. These subsidiaries Owned by the individual. Individuals can obtain information from the head office, or share the information with the head office after research and development. Therefore, the connected client can push and pull resources (code) to the server, so as to update the code version in the server or download the code from the server to use locally.
2 Create a new github blog
1 New repo
About repo knowledge refer to appendix
After the registration is complete, log in and enter on the web page: https://github.com/ to enter the official website interface (you can also directly enter the personal interface, but the creation method is different)
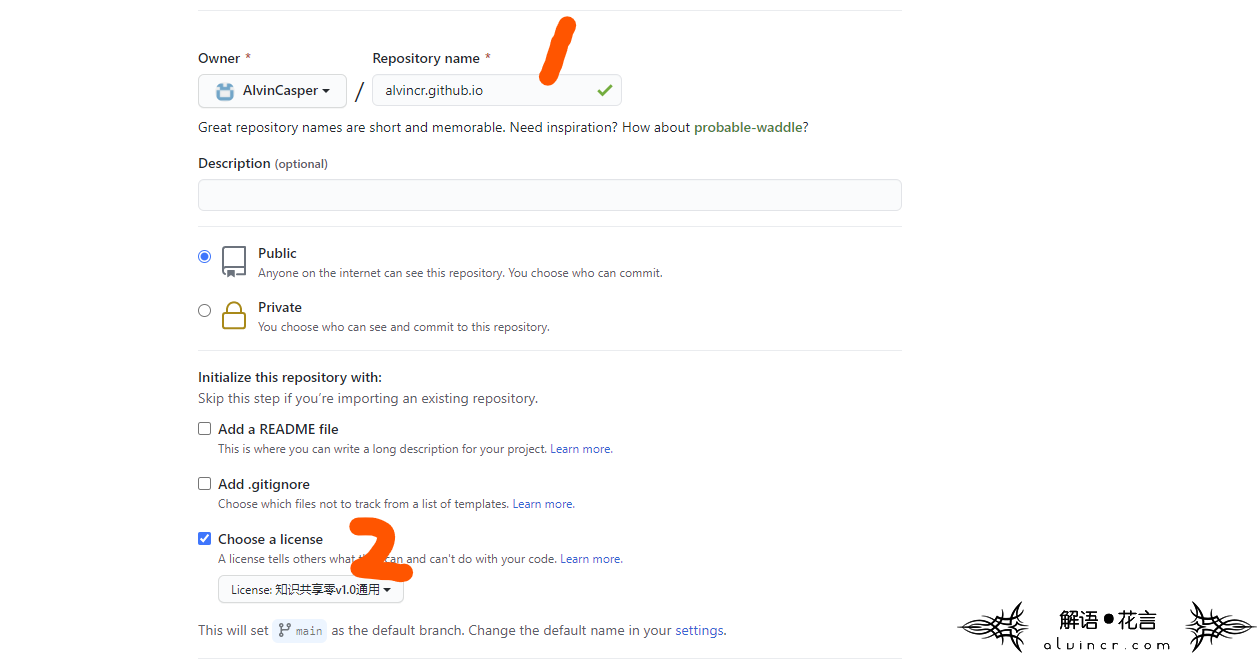
In the upper left corner, select New repositories (repository),
2 matters needing attention
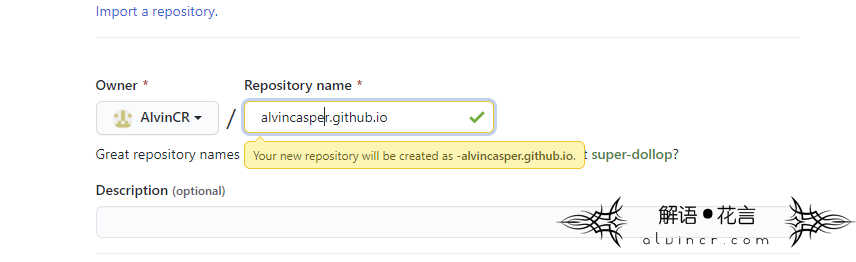
(1) The name must be in the form of
(2) You can see that I use the Creative Commons Agreement on No. 2. The specific choice can be based on the individual or not. For the selection method, please refer to my choice agreement tutorial
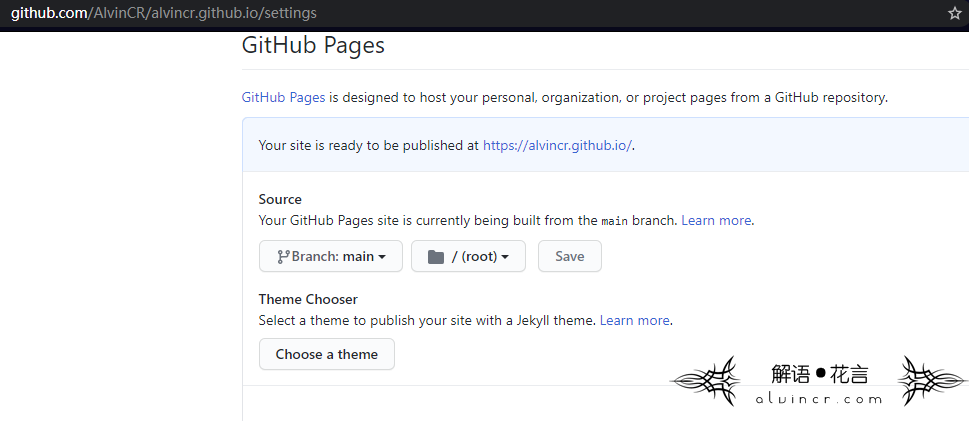
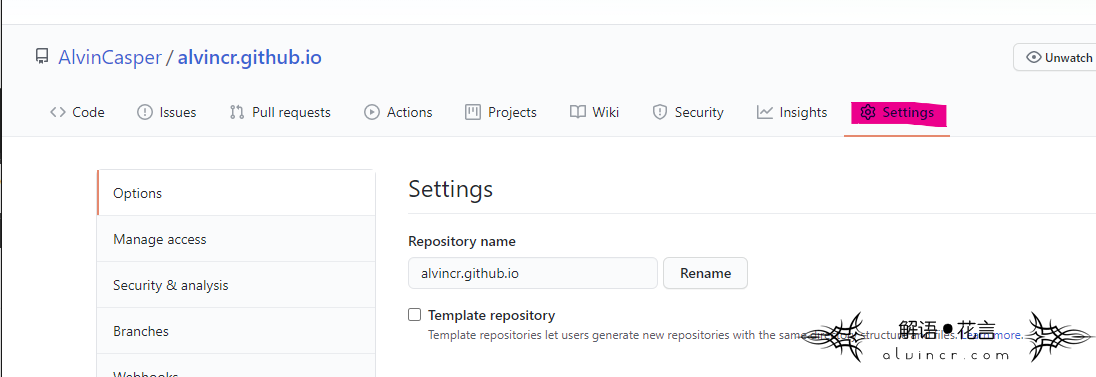
3 Set up Github Pages
Find the setting tab, drop down to the bottom and there will be a github pages option.
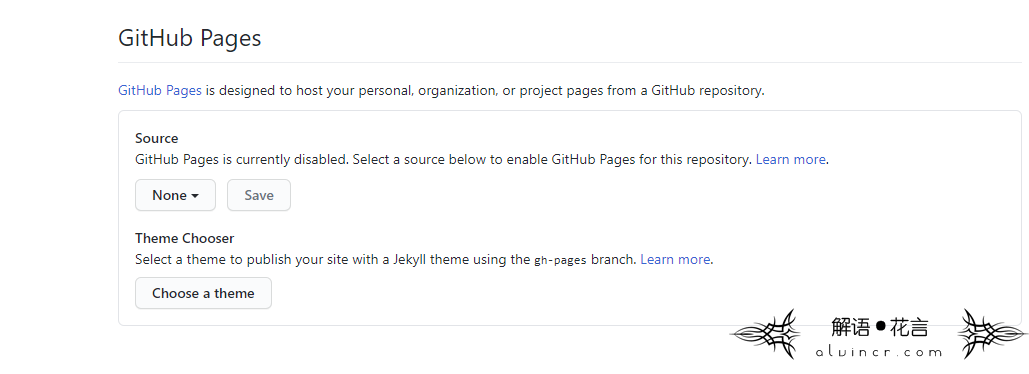
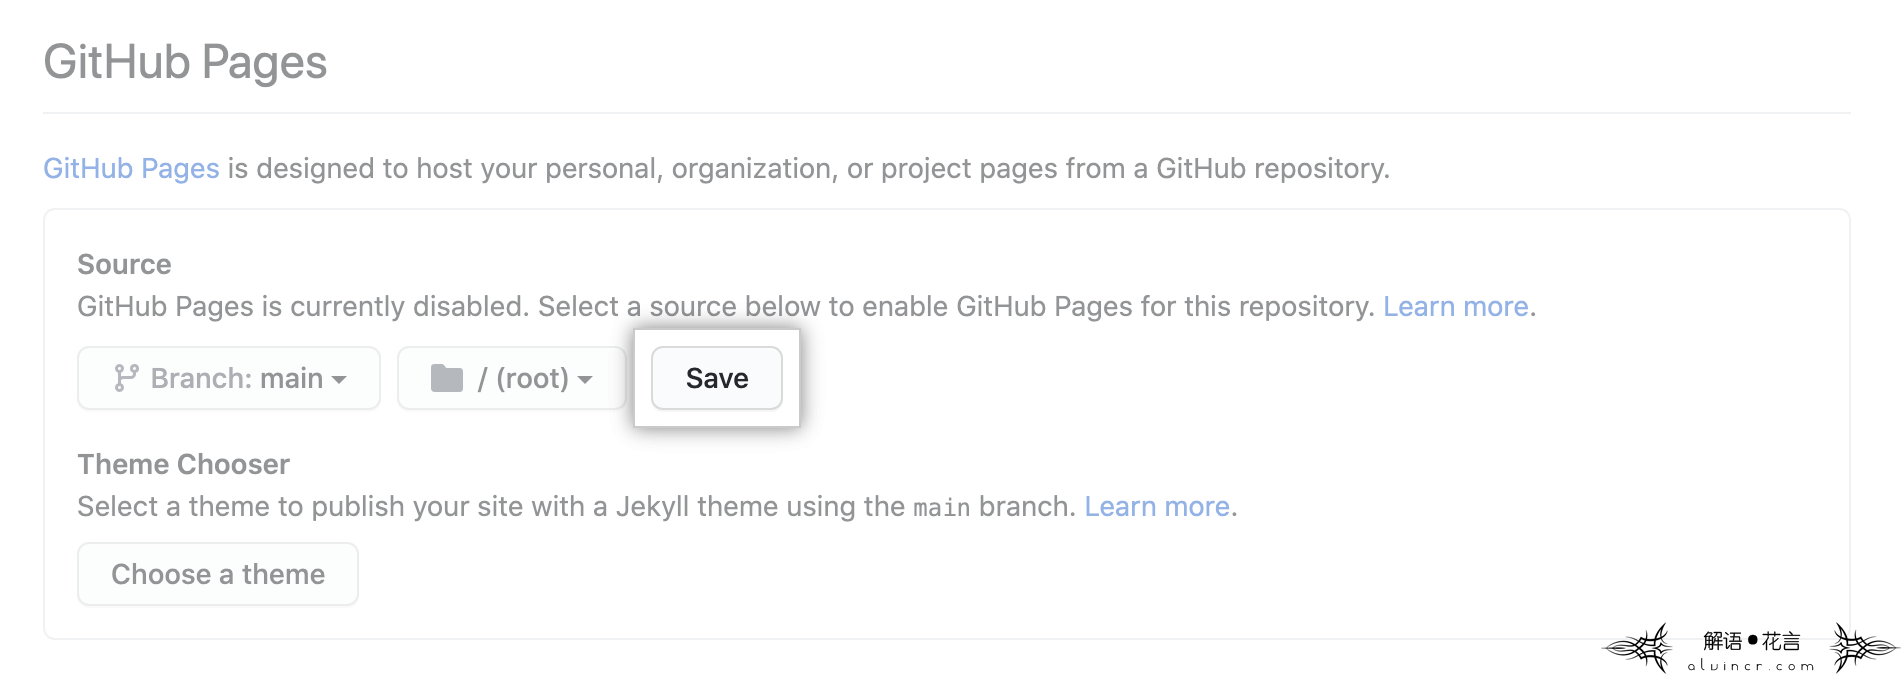
Under “GitHub Pages”, use the “ None” or “ Branch” drop-down menu and select a release source.

(Optional) Use the drop-down menu to select a folder for your publishing source.
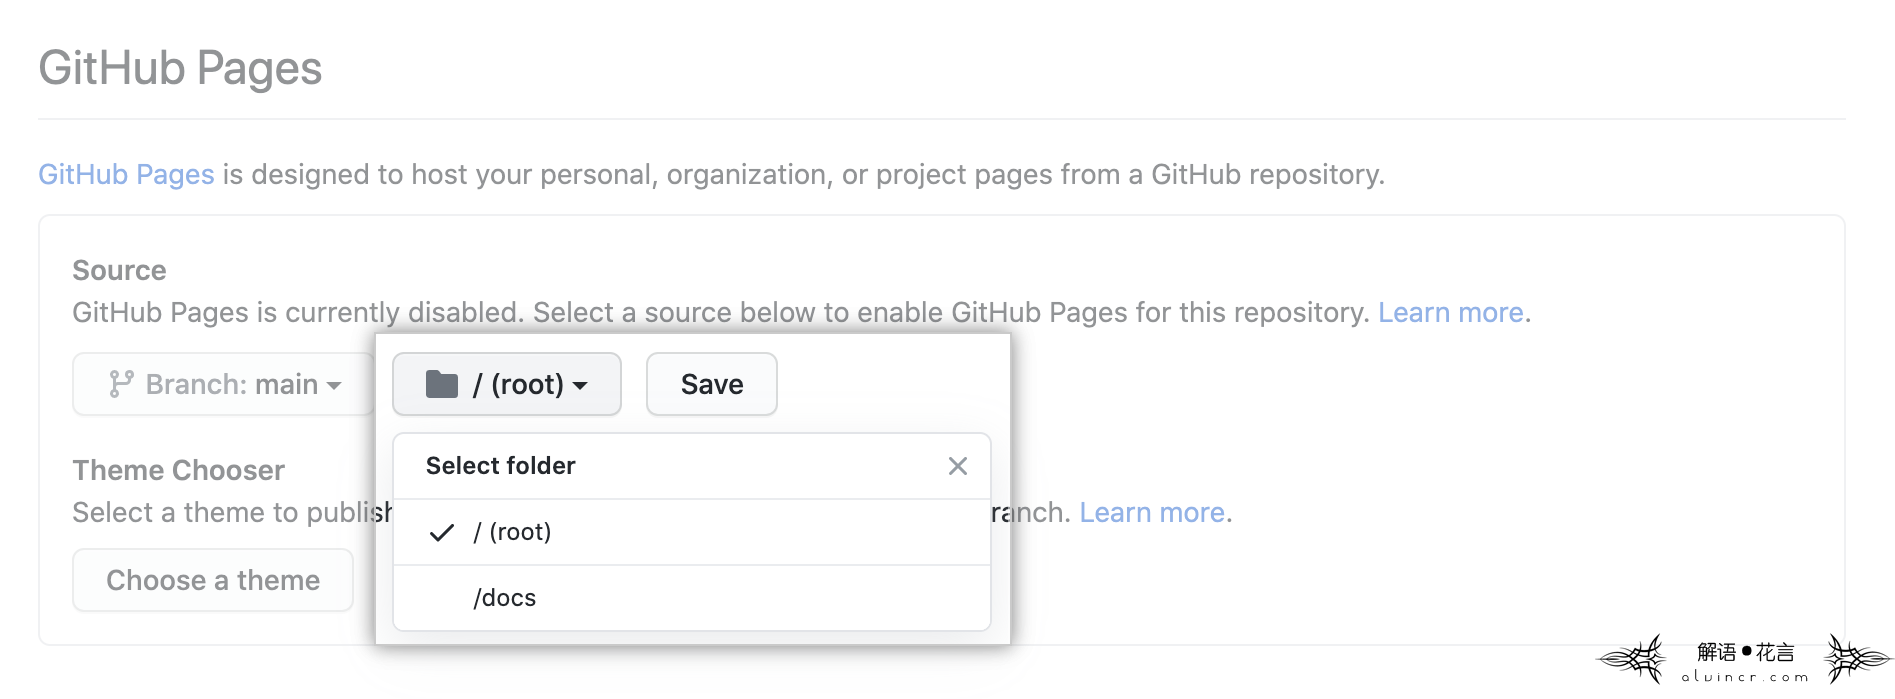
Click save .
4 Choose a theme
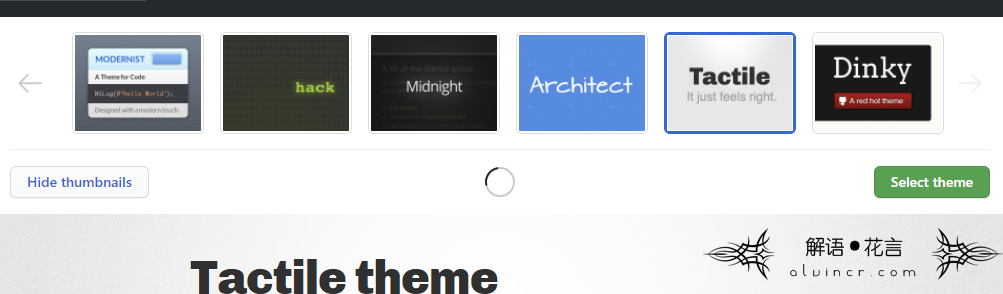
The theme selected here can be downloaded or not.
3Set up using GitHub client
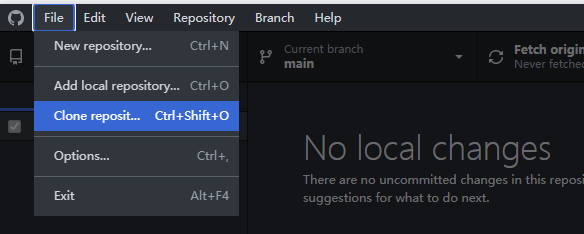
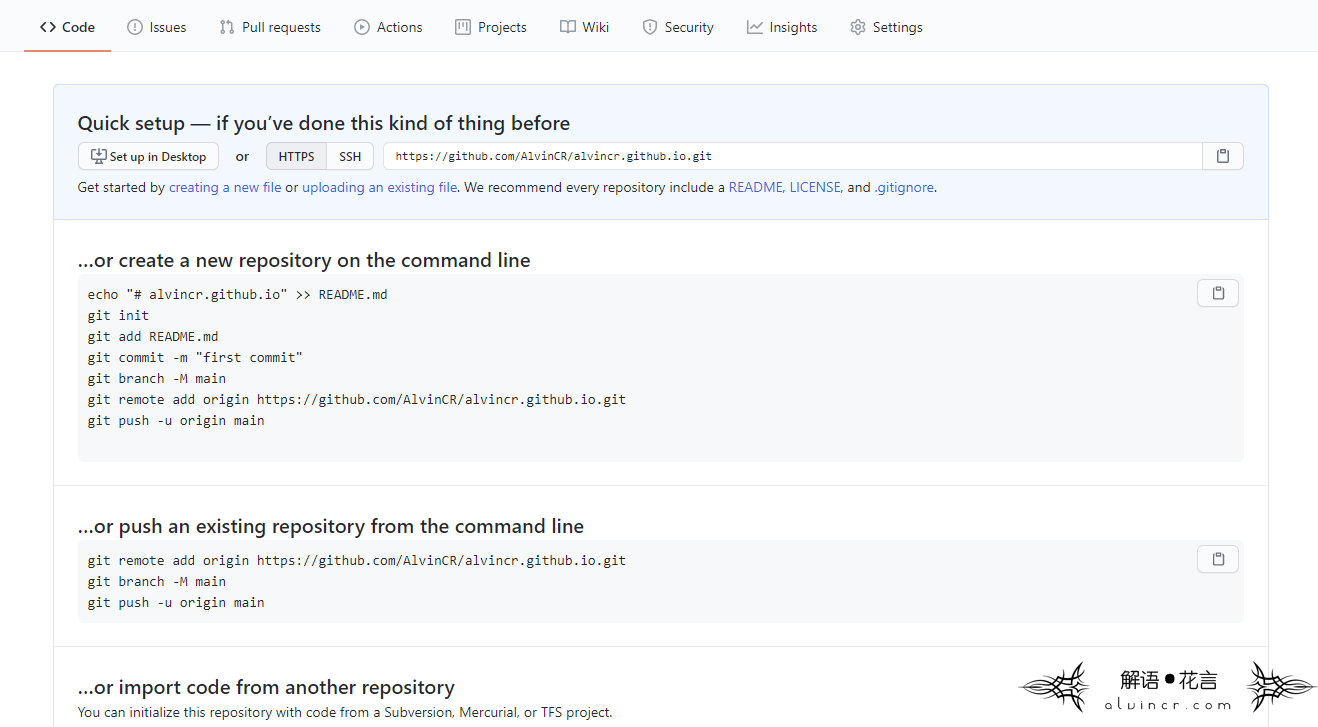
1 Clone the warehouse
Shortcut key ctrl+shift+o
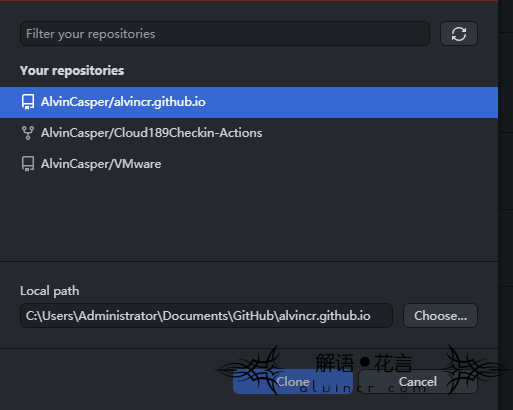
Select the library to be cloned, and then clone it locally.
2 Clean up files
Only keep .git files, delete all others

3 Download the creation template
You can use the template in 2.4, or you can download the new template yourself, of course, you can also hand-write the entire web page. The personal blog alvincr.com will put a few templates I selected at the end of this article.
4 Upload template
After downloading, unzip to the cloned folder

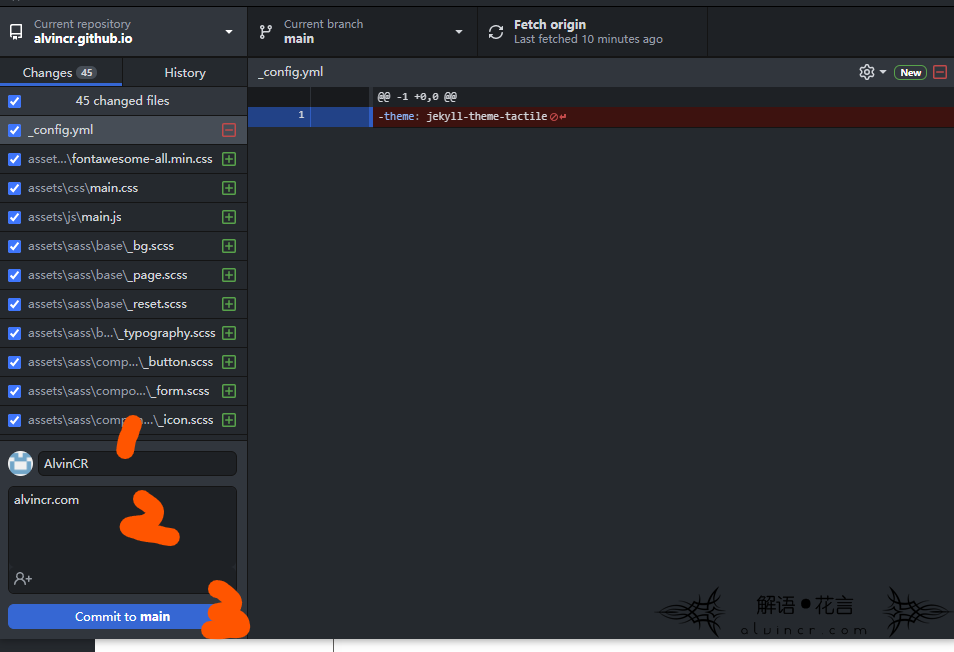
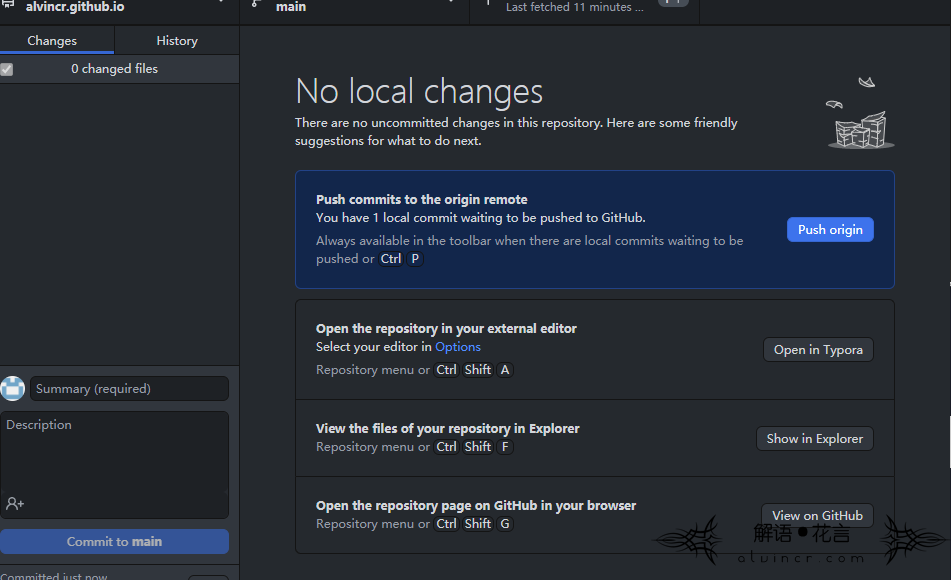
You can see the changes in the GitHub desktop version, fill in the content at places 1 and 2 in the figure. (For example alvincr.com), click commit to mian to submit
5 Push to github
Click Push origin, the push progress will be displayed in the upper right corner, just wait for completion.

6 Push effect
Unsuccessful push will show:
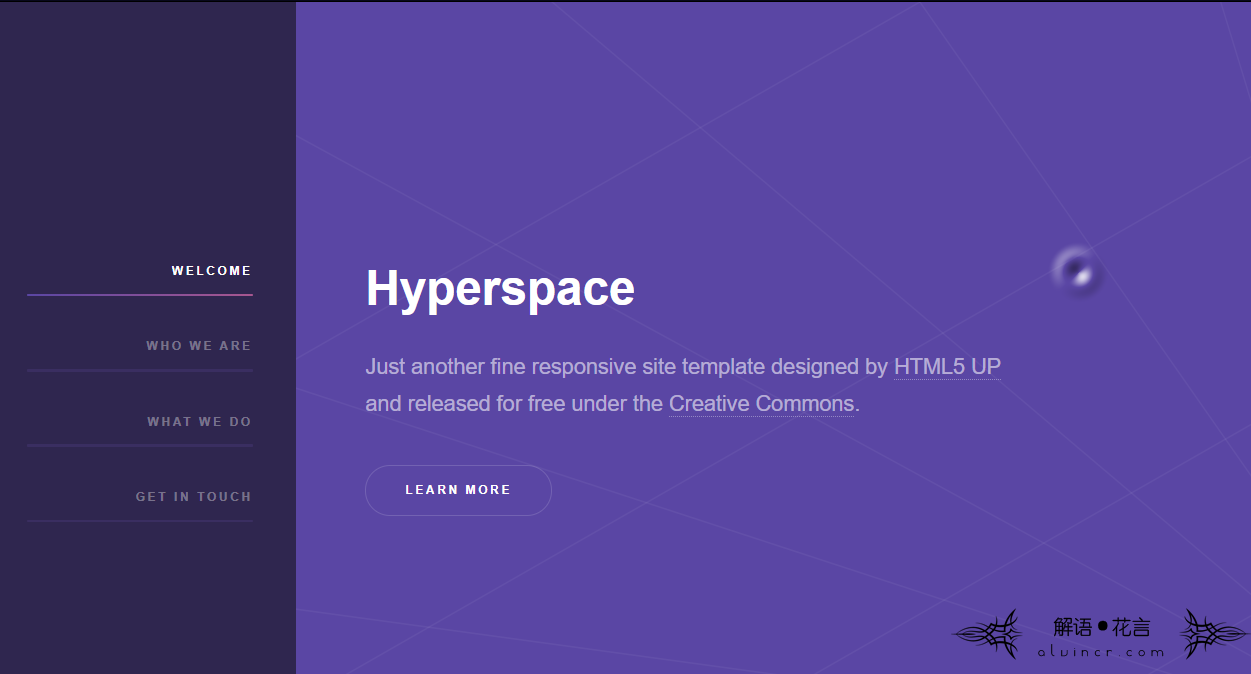
Successful push will successfully enter the theme interface, the display effect is as follows:
4 questions
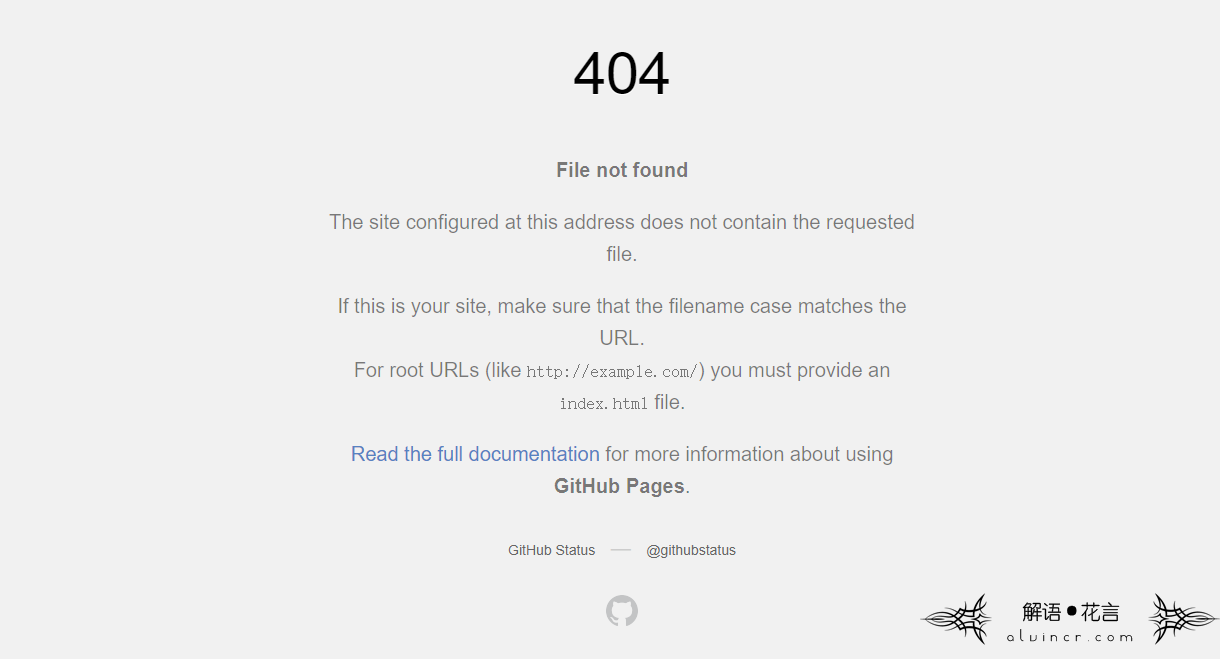
1 Cannot enter the blog after selecting a topic
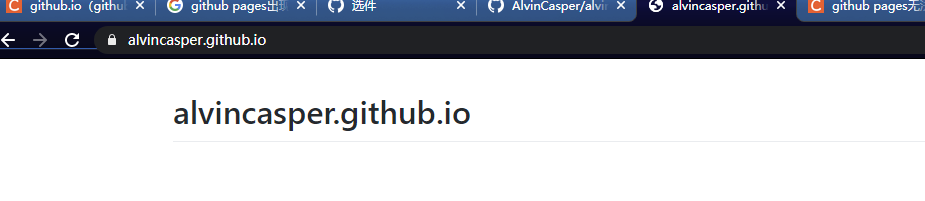
Enter alvincr.github.io and you will see the following 404 interface, indicating that there is no GitHub Pages website. If you want to publish it, please read the complete documentation to learn how to set up GitHub Pages for your repository, organization or user account.
I ran into this problem at the beginning, until I followed the official website tutorial completely after the 404 interface was completed, thinking that maybe it was because the server was delayed, and then I created another one and waited, but when I created it with alvincasper.github.io There is no such problem. You can access directly.
In addition, I re-created alvincr.github.io and it is still invalid, so I think that the user name must be used when creating a blog with github, and other names are invalid.
But this conclusion is too sloppy, so I re-apply for an account and try two more names to create a blog to see if it succeeds.
2 Recreate account
Reason: Question 1
I tried to rebuild the account and found that alvincasper.github.io could be established. However, this alvincasper.github.io has been used by another account of mine, so I can be completely sure that creating a blog on github can only be created with a user name, other names are No way.
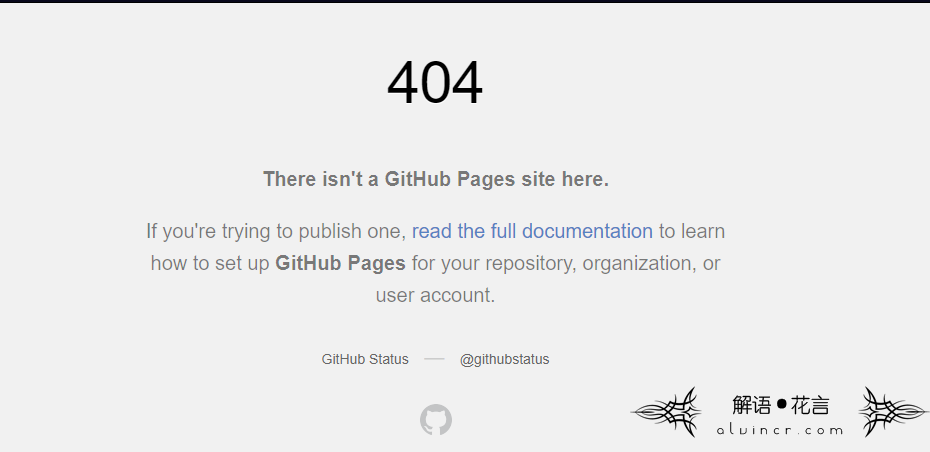
3 GitHub Pages is currently disabled
Since the account I used at the beginning was an account I created a long time ago, there was no problem with this newly created account.
But if you add README and other files during the precautions in the second step of this article (create a new github blog), this should not happen
The solution to the problem is as follows:
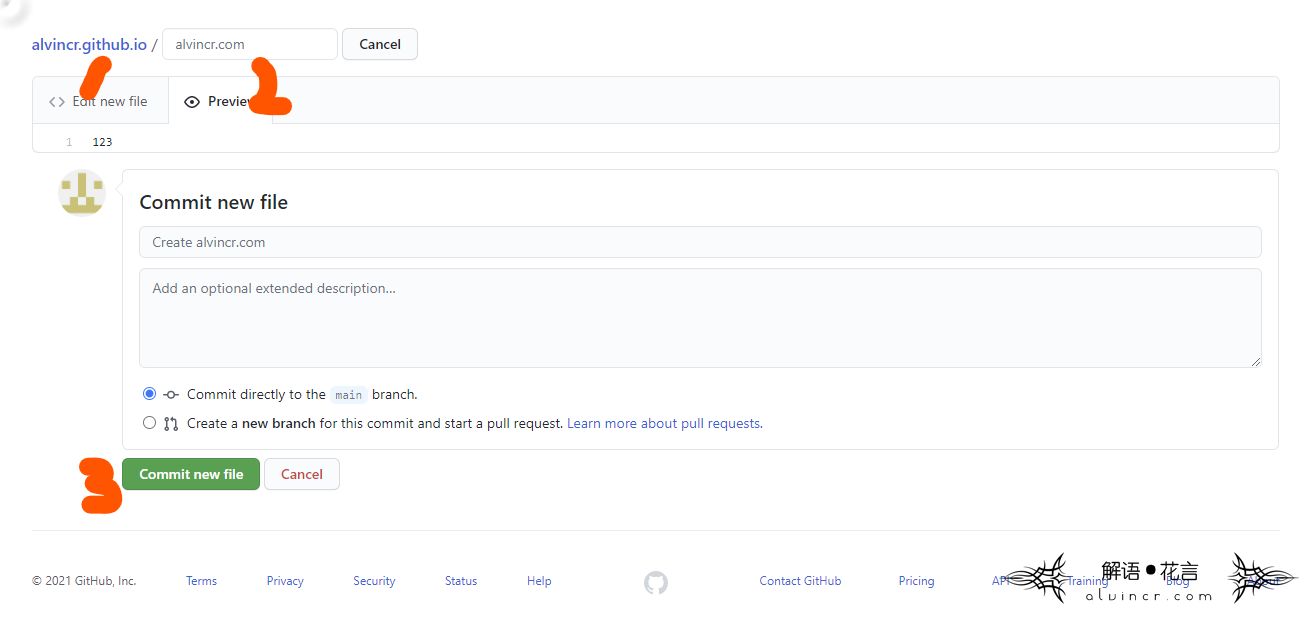
Click on the red arrow to create a new directory
 +
+
Click the figure 1 below (edit new file) to enter the content at will, and then click 3 to submit the file to solve it.
Effect picture: